- "Victory Favors Preparation"
- anthony@pintocapitalinvestments.com
Expect the Unexpected: Glenville Circle Pt. 2
Hire Slow, Fire Quick! Glenville Circle Pt. 1
August 1, 2019Your Network is Your Net Worth
August 30, 2019Expectation is the mother of all frustrations.
Antonio Banderas
Last post I talked about the struggles of finding a realtor and buying my first property on Glenville Circle in Virginia Beach, Virginia. After closing, I moved in with a friend from school and got settled into my first home!
There are plenty of pros and cons on both sides for renting an apartment versus buying a house. In my brand-new homeowner mind, the pros of having a place to call my own, doing whatever I wanted with the house and having my mortgage paid down over time made the cons of future maintenance issues, taking care of the yard and property taxes—to name a few—inconsequential. When I bought the house, I knew it needed some updated renovations to bring it into the 21st century but I never figured those repairs would come so soon.
Bathroom Brawl

Before…
The first issue we found was during our first Christmas party in the house. Everyone was getting along and then my now-wife walked into our downstairs bathroom. Her socks got wet when she walked into the bathroom, but the volume of water made it seem like someone had just washed their hands and then let them drip on the floor. Our real concern came the next day when there still remained a decent amount of water on the floor. “Hmmm…the floor seems squishy,” I thought… After poking the slightly peeling linoleum flooring, we found that there was about a quarter inch puddle of water around the toilet. Turns out, the rubber washers on the bolts holding the toilet tank to the bowl completely disintegrated and the tank was leaking straight onto the floor, under the linoleum and under the baseboards. After cleaning up the water and draining the tank and bowl, I also found that the water had leached up the inside of the drywall around the toilet. How did I know it was on the INSIDE of the wall you may ask? Pulling back the baseboards revealed water damage to the base of the framing and soggy drywall where they touched. I cut out the drywall to see the extent of the damage and low and behold, found black mold all up the inside of the drywall—a good three feet up! It seemed this leak had been going on for quite a while. What I thought was a simple toilet and flooring swap turned into a potentially expensive nightmare. Thank God the foundation was a concrete slab underneath.

After…
Professional companies that deal with black mold removal and disposal quoted us about $10,000 for their services. Being resourceful, I figured I could forgo this cost and do it myself. There are several natural remedies for black mold, one of which is white distilled vinegar. After removing the toilet and vanity, I cut out the majority of the molded drywall (careful to avoid spreading mold spores, which can cause serious health issues) and sprayed the remaining framing and drywall with the vinegar. Finally, we used a HEPA filter air purifier and ran it non-stop. Then we just left it for about 2 months. The best thing to do was to attempt to kill the existing black mold and filter the air to prevent spread of mold spores. After the black mold was cleaned and verified dead, my now-wife and I reinstalled new drywall, laid marble flooring, installed a brand-new toilet and vanity and painted the walls. Personally, I think it came out quite nicely! If only that was our last bathroom problem…
Bathrooms: 2 Pintos: 0
Phase two of the Bathroom Brawl came a year and a half later, shortly after marrying my wife. I remember getting home after almost 36 hours on the boat and finding debris in our living room and my wife looking sheepish. “Oh boy, here we go,” I thought. After taking a relaxing bath in our not oft used guest bathroom, Peggy went downstairs to let the dog out and noticed a drip coming from our ceiling, underneath the bathtub. Deciding to poke the soggy ceiling, Peggy’s finger went straight through and a good chunk of the ceiling fell out. Round 2 began in a watery mush of drywall, popcorn ceiling and plaster.


The overflow drain had become misaligned over the years and when the tub was filled with standing water, began to leak down the outside of the drain piping and onto the living room ceiling underneath. It became evident that this had been a problem in the past when I pulled off the drywall piece and discovered a ceiling patch. The tub drain had also been shoddily caulked around the drain connection instead of replaced and sealed.
We realized that the drain fix required a brand new tub so we decided to gut everything and start brand new. We took out the old tub, shower walls, toilet and vanity and removed the laminate flooring. My crash course in plumbing started with removing the original copper piping of the shower/tub combo. I opted for Pex piping instead of copper due to the cheap material, great flexibility and ease to work with. After three attempts to make a waterproof seal on all the new connections, it finally held! Thank God for Sharkbite© connections!


After dropping about $1000 on a tub and new shower walls, I laid new tile, installed a larger vanity and low-flush toilet and painted the walls. All in all, it came out to about $2,000 for the bathroom renovation—much cheaper than using a contractor. Maybe I should take a win on that one, because it came out awesome!
Moving On Up
Around the same time as the upstairs bathroom leak, we noticed another leak—this time from an external source. The previous owners had converted the one car garage into an extra “bedroom” complete with a walled in garage door. I mainly used this space as a workshop for woodworking so I spent a lot of time in there. Over time, I noticed the slit window installed in the wall where the garage door used to be, was sagging and visibly bowing. The drywall around the window also began blistering and peeling. Not good! It turns out the window was improperly installed and sealed on the exterior wall so rain water slowly crept in behind the wall; eating away at the framing and drywall over the years. The fix itself wasn’t too difficult. What was difficult was finding—and KEEPING—a contractor to perform the work!

A decent amount of water damage can be seen around the old window frame.
We must have called ten to twelve different contractors trying to get bids for the wall replacement—spanning a 3 month period. Work often got in the way of proper follow-up but in the end only 3 contractors responded. We got bids for $10,000 and one for $1,500. Finally, we decided on a quote for $4,000 from a company that communicated effectively. We signed the contract, agreed to the terms and everyone agreed to start the work immediately. Almost two weeks later, work had still not begun. The contractor continuously came up with lame excuses about other jobs, material availability and weather conditions until I finally told him if he didn’t show up, we would fire him and move on!
Boy did that get him moving! The work itself only needed 4-5 days to complete but dragged on for almost 3 weeks! My wife decided to call this guy every day to keep him accountable. In hindsight, we should have just fired him (yet another example of hire slow and fire quick)…The contracter himself was there for the first day and the last day when he just did a few small cosmetic fixes. In the meantime, we had a subcontractor working on the job, which normally wouldn’t be a bit deal, but it made for an interesting time trying to get this job to completion.

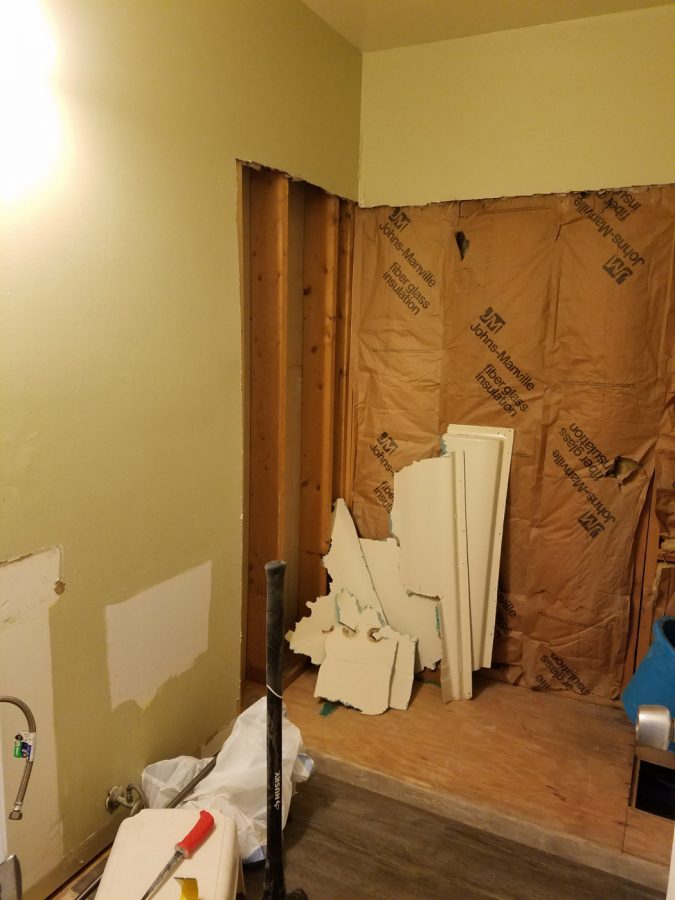
Progress made! At this point, the new insulation was in and the cutout for the new window can be seen here (covered by the cardboard).
Progress made! At this point, the new insulation was in and the cutout for the new window can be seen here (covered by the cardboard).[/caption]We avoided being around when he worked because he was a talker and would rather tell you his life story than perform the work we hired him for. Around the 3rd week, he had removed the old wall, replaced the framing, installed a newer window, mounted new insulation, matched and attached the new siding and hung new drywall. By the way, the contractor himself was originally going to put in the old, slightly damp and potentially moldy insulation. It was the subcontractor who recommended that we go out to Home Depot and just buy a new roll or two of new insulation—it would be about the same amount of work for him to put it in. However, that was another lesson learned: get things approved by the contractor himself to avoid hidden fees. He charged us to put in the new insulation, which was never part of the original contract and involved many phone calls back and forth. Ultimately, we were so tired of dealing with them that we just paid the few extra hundred dollars.

The final product viewed from the inside…worth it!
With the work threatening to push into the 4th week, we decided to cut the work, pay him his money and finish the job ourselves. Mudding the rest of the drywall and painting were all that remained—relatively easy tasks. Here is another lesson learned: use references for contractors and be sure to go over the contract with a fine-tooth comb. We should have included a timeline clause within the contract, holding the contractor to the agreed upon 2 weeks were originally quoted—at the risk of losing money. My issue with contractors is that some are swindlers just looking to get in and out to make a quick buck. There is no sense of ownership or accountability to a schedule. You really have to be careful because what looks complete, can be completely shoddy work that causes major issues years down the line.
Bottomline: $%@& happens. Be prepared for the level of maintenance and repairs that come with an older house and set aside reserves for such occasions. If you’re handy, even better! Expect the unexpected, as they say. Lastly, be cautious when hiring anyone to perform work for you—whether it’s bathroom renovations or lawn care. Emotions tend to get in the way of business and nothing can ruin a relationship quicker. Stick to your guns and don’t be afraid to fire quick.
Stay tuned every other Thursday for more blogs on networking, our first investment property and more! Please also feel free to contact us or mention in the comments topics that interest you!


